Size guide
Selecting the Proper Lens Type
The type of lenticular lens you choose impacts the viewing angle, image clarity, and available effects such as 3D depth and flip animations.
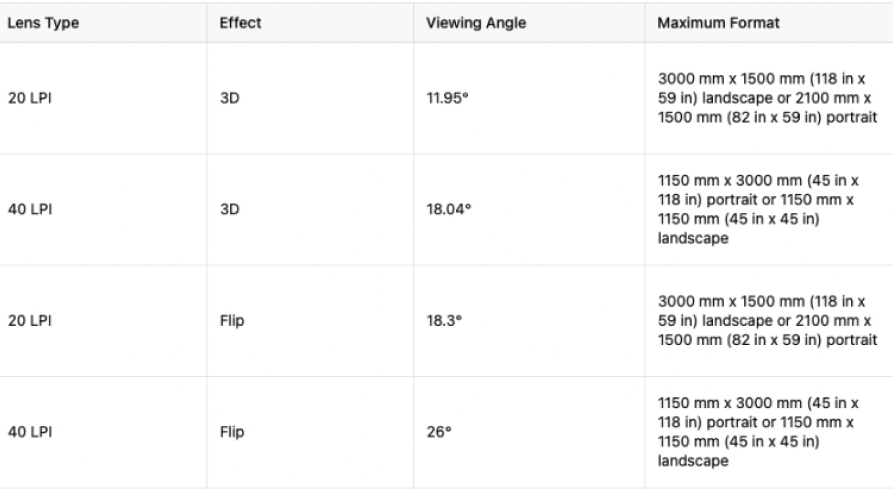
Below is a detailed breakdown of KDX lenticular lens types along with recommendations for image size and format.

Recommended Image Sizes and Resolution
When preparing images for lenticular printing, it’s crucial to choose the right size and resolution to ensure optimal print quality.
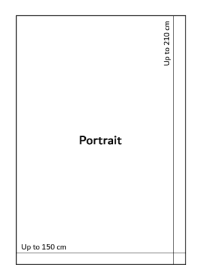
Here’s a guide to the recommended image sizes based on the lens type and format.

Tips for Preparing Your Images

File Formats: We recommend uploading images in PNG, JPG, or TIFF format for the best quality results.

Color Profiles: Ensure your images use the RGB color profile, which is standard for lenticular printing.

Image Quality: Avoid using images with visible compression artifacts or low quality.
Our team can handle final image adjustments in-house, ensuring your print achieves optimal clarity.
Choosing the Right Effect
Each lens type is suited for different effects. Here’s a quick guide:
Flip Effect: Works best with 40 LPI or 20 LPI lenses. Ideal for creating multiple image transitions.
3D Effect: Achieves optimal results with 20 LPI lenses for large-scale depth and 40 LPI for detailed, smaller 3D visuals.
Animation: Best suited for 20 LPI lenses designed for motion-like sequences.
Depth
Zoom
Animation
Flip
Morph
Mix
Note:
For 3D effects, the lens direction should be vertical for best results.
For flip and animation, the lens direction can be horizontal.
Example Projects and Recommendations
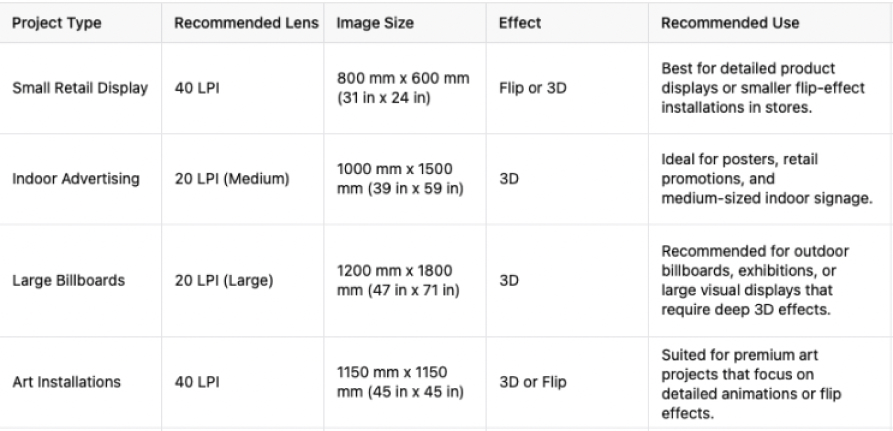
Below is a table with general recommendations for customers regarding lenticular printing and
specific applications. This will help guide your choice of lens type, image size, and desired visual effects.

Orientation and Placement
3D Effect: For the best results, the lens should be oriented vertically to maximize the 3D depth effect.
Flip Effect: A horizontal lens orientation is recommended for smoother transitions between images.
Bleed Area
Include a 3-5 mm (0.12-0.2 in) bleed around the image edges for trimming during production.
Our in-house team can also manage the bleed area if required and ensure that your images are printed with precision and accuracy.


